Friday, August 14, 2009

A difference of opinion

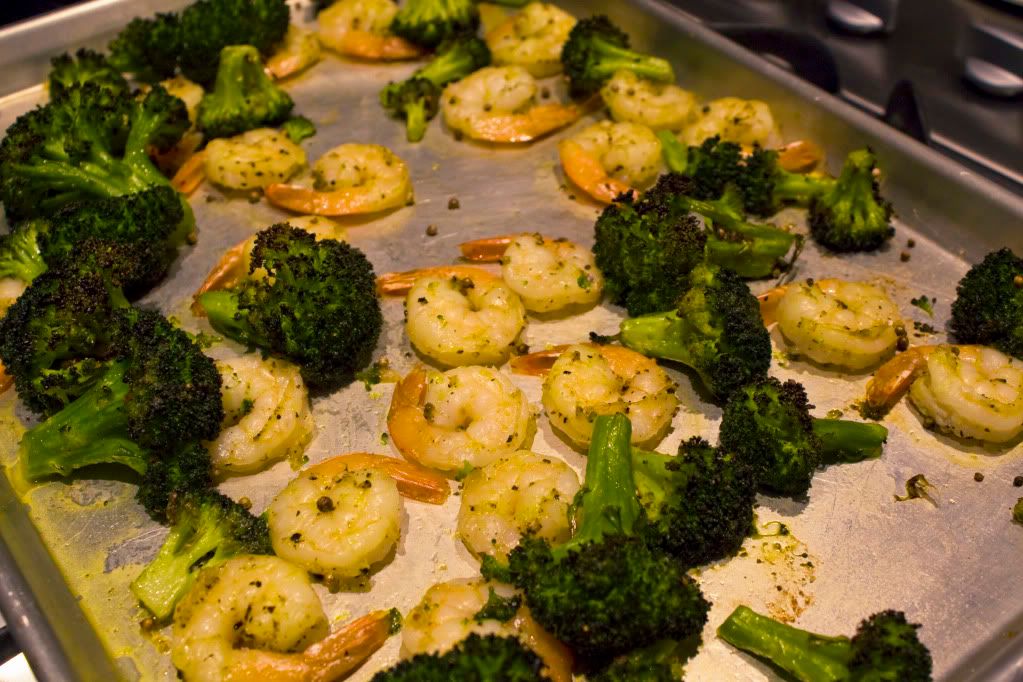
Collin and I usually like the same things, gastronomically speaking at least. Unfortunately, we differ greatly on our love of this Roasted Shrimp and Broccoli dish that I got off The Wednesday Chef's blog. It's so simple and so delicious that I felt a little foolish using an actual recipe for it. Still, all culinary insecurities aside, I feel the need to share it with you all.

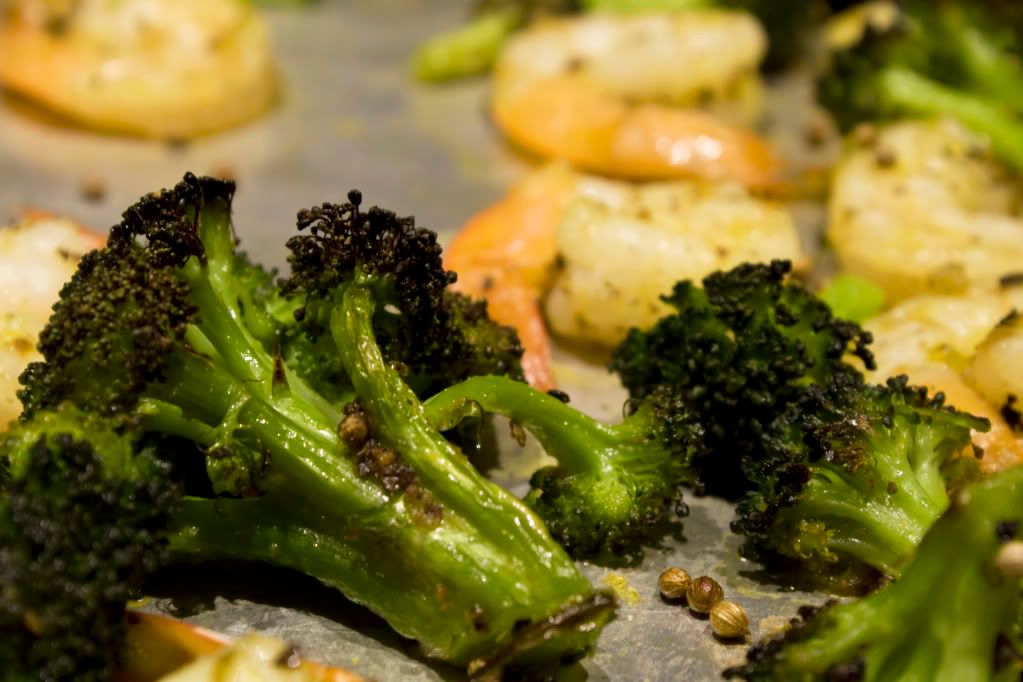
It's a good idea, combining sweet-briny shrimp with slightly bitter broccoli and finishing it all with a generous squeeze of lemon. The part where I can't seem to agree with my husband is the recipe's use of whole spices. Coriander and cumin seeds, to be exact. I prefer them whole; I love the pleasant little pop each coriander seed makes when you bite into it, along with the tiny burst of concentrated flavor that follows. Those darling seeds of deliciousness wedge themselves happily into the broccoli florets, awaiting my eager teeth to seek them out. They give a nice savory balance to the shrimp, too. Heaven!


Collin does not see the joy I've just described. Instead, he finds the seeds a nuisance, spending more time than necessary picking each and every little seed out of his food. It's sad. Just sad. He prefers it when I use ground spices, claiming that the more even and subtle distribution of flavors is a better complement to the dish. I think we all know who is in the wrong here (hint: it's Collin). I have made it his way a few times, and it's still good that way, but why not try for a little excitement once in a while? I mean, really, how often do you get to use whole spices in your cooking? That's what I thought. Nevertheless, if you insist on wimping out, just substitute ground spices and your taste buds will still thank you.

Oh, and I serve this with basmati rice. The aromatic rice goes perfectly with the dish. Collin prefers it with jasmine rice. Where did I go wrong?


Roasted Shrimp and Broccoli
adapted from The Wednesday Chef (who got it from Melissa Clark)
serves 4

2 pounds (1 kg) broccoli, cut into bite-size florets
4 tablespoons (60 ml) extra virgin olive oil
1 1/2 teaspoons whole coriander seeds (or 1 teaspoon ground)
1 1/2 teaspoons whole cumin seeds (or 1 teaspoon ground)
1 1/2 teaspoons kosher salt
1 teaspoon freshly ground black pepper
1 pound (500 g) large shrimp, shelled and deveined
1 large lemon, zested

1. Preheat oven to 425 degrees F (220 C). In a large bowl, toss broccoli with 2 tablespoons oil, coriander, cumin, 1 teaspoon salt, and 1/2 teaspoon pepper. In a separate bowl, combine shrimp, remaining 2 tablespoons oil, lemon zest, remaining 1/2 teaspoon salt and remaining 1/2 teaspoon pepper.

2. Spread broccoli in a single layer on a baking sheet. Roast for 10 minutes. Add shrimp to baking sheet and toss with broccoli. Roast, tossing once halfway through, until shrimp are just opaque and broccoli is tender and golden around edges, about 10 minutes more. Remove from oven. Squeeze lemon juice (from your zested lemon) all over shrimp and broccoli and toss. Serve immediately.

Friday, July 17, 2009

I love a good running gag

We celebrated Collin's birthday a few days after returning from Japan. Tough act to follow, so we just kept things very low-key. As for birthday cakes, anything elaborate was out of the question. How could I hope to compete with the kinds of treats we had in Tokyo? I couldn't. Not yet, anyway. And I'm okay with that. Really, I am. Instead, I embraced the simplicity theme and made him lemon bars for his birthday dessert. Why lemon bars, you ask? Oh, I feel a story coming on...

I'm a sucker for grocery store sales - you know the kind where you get an additional discount when you purchase sale items in sets of 10? The kind where, if you do it right, you actually save more than you spend? I kind of get a thrill from those. Anyway, somewhere near the beginning of our marriage, I fell prey to one of these amazing sales and brought home a box of Krusteaz Lemon Bar Mix.

I don't like lemon bars. Not sure why, since I love everything else lemon-flavored. Every few weeks Collin would (half) jokingly remind me that there was a box of lemon bar mix in the pantry waiting to be made, especially when I would complain of a sweet tooth. They never got made while we were in L.A., so we brought the box along when we moved to Utah for a few months. Again, every few weeks that box would become the topic of conversation. Again, it simply languished on the pantry shelf. Just 8 short months after moving to Utah, we found ourselves with an unexpected offer to move to New Zealand for work. It was time to finish all the food in our pantry or else let it go to waste. I took a deep breath and brought out The Box late one night, determined to make my husband happy. As fortune and the FDA would have it, the lemon bar mix had long since expired. What were we doing schlepping that silly thing all over the country, anyway? I'm still not sure, but somewhere in a landfill, there's a sad little box of lemon bar mix that never fulfilled its destiny.

To you, dear box of lemon bar mix, I dedicate these far superior freshly made ones. Oh, and to my darling husband as well. Happy (now belated) birthday, and may all your lemon bars come true!

For the record, I still don't like lemon bars. But Collin loved them.
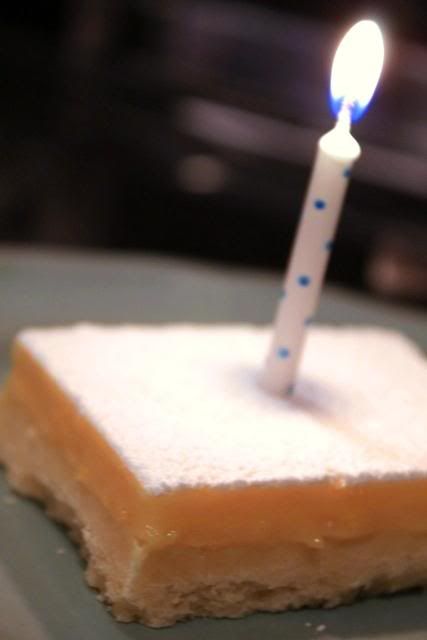


Lemon Bars
from Rose's Christmas Cookies, by Rose Levy Beranbaum

Shortbread Base
10 tablespoons unsalted butter, softened (142 grams)
2 tablespoons powdered sugar (14 grams)
2 tablespoons superfine or caster sugar (granulated also works) (25 grams)
1 1/4 cups all-purpose flour (180 grams)

Lemon Curd Topping
4 large egg yolks
3/4 cup sugar (150 grams)
3 fluid ounces freshly squeezed lemon juice (about 2 1/2 large lemons) (90 mL)
4 tablespoons unsalted butter, softened (57 grams)
Pinch of salt
2 teaspoons finely grated lemon zest (4 grams)
2 tablespoons powdered sugar for dusting (14 grams)

Line an 8x8-inch aluminum or glass pan with foil, leaving a 2-inch overhang on two sides.

In a medium bowl, whisk together the sugars. In a large bowl of an electric stand mixer, cream the butter with the sugars until light and fluffy. With your fingers or with the electric mixer, mix in the flour until incorporated. If using the mixer, add the flour in 2 parts.

Place oven rack in the middle of the oven.

Preheat oven to 325°F (300°F if using glass)/160°C (150°C)

Pat the dough into the prepared pan. Use a fork to prick the dough all over.

Bake for about 30 to 40 minutes or until the edges are lightly browned and the top is pale golden (do not brown).

While the shortbread is baking, prepare the Lemon Curd Topping.

LEMON CURD TOPPING
Have a strainer, suspended over a bowl, ready near the range.

In a heavy non-corrodible saucepan, beat the egg yolks and sugar with a wooden spoon until well blended. Stir in the lemon juice, butter, and salt. Cook over medium-low heat, stirring constantly, for about 6 minutes, until thickened and resembling hollandaise sauce, which thickly coats a wooden spoon but is still liquid enough to pour. (A candy thermometer will read 196°F.) The mixture will change from translucent to opaque and begin to take on a yellow color on the back of a wooden spoon. It must not be allowed to boil or it will curdle. (It will steam above 140°F. Whenever steaming occurs, remove the pan briefly from the heat, stirring constantly to prevent boiling.)

When the curd has thickened, pour it at once into the strainer. Press it with the back of a spoon until only the coarse residue remains. Discard the residue. Stir in the lemon zest.

When the shortbread is baked, remove it from the oven, lower the temperature to by 300°F. (275°F if using a glass pan), pour the lemon curd on top of the shortbread, and return it to the oven for 10 minutes.

Cool the lemon bars completely in the pan on a wire rack. Refrigerate the pan for 30 minutes to set the lemon curd completely. Place the powdered sugar in a strainer and tap the strainer with a spoon to sprinkle a thick, even coating, entirely covering the lemon.

Use the foil overhang to lift out the lemon bars onto a cutting surface. Using a long, sharp knife to cut the shortbread into bars, wiping the blade after each cut.

Store:
In an airtight container at room temperature, or in the refrigerator or freezer. Keeps 3 days at room temperature, 3 weeks refrigerated (individually wrapped in plastic wrap to prevent drying), or 3 months frozen.
Friday, July 10, 2009

No reason

We spent the past 10 days in Japan, going from one delicious food to the next and catching a few sights in between. We had sushi fresh from the big Tokyo fish market at 6:00AM

A few treats from Monsieurs Hermé and Ladurée (among others). How I've missed macarons!

We also managed to pick this little baby up in Tokyo. Pretty...

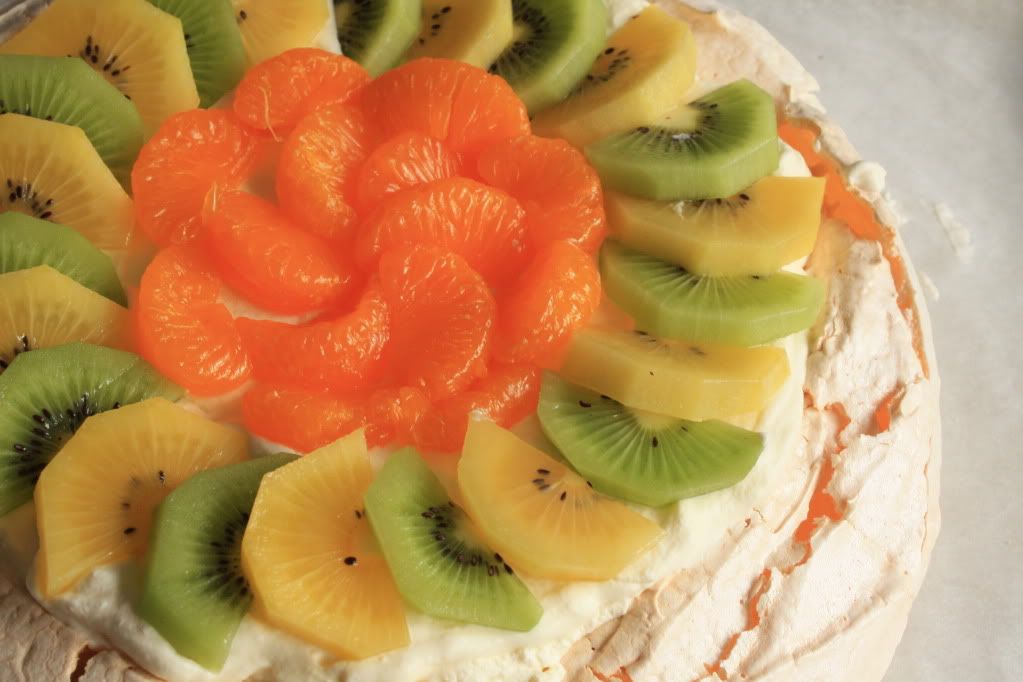
But enough of our gallivanting about the world. This isn't a travel blog! This is about senseless baking! Collin's birthday was on Tuesday. I made him lemon bars (more on that later) and had 5 egg whites left over, begging me to do something with them. Having just consumed an inordinate amount of macarons like the ones above, I didn't feel the need to make my own just yet. Plus, it had been raining on and off all week - very bad news for anything involving a meringue. Then again, there was that pavlova that I've been wanting to make for ages, and it wasn't raining today, and it was Friday...


Okay, so maybe there was no real good reason for making a pav today, especially given the high likelihood of failure from how humid it was. But you know what? I did it anyway. And you know what? It was good! The thin, delicately crisp outer shell yielded to a slightly chewy in-between area that finally gave way to a soft, pillowy marshmallow inside. The whipped cream was only lightly sweetened, so it balanced the sweetness of the meringue beautifully with the sweet-tart fruit. It took three people just a few hours to eat the whole thing, mostly because we just couldn't stop. I regret nothing.


Pavlova
adapted from Gourmet, April 2009

1 cup superfine (caster) granulated sugar
1 tablespoon cornstarch
3 large egg whites, room temperature
3 tablespoons cold water
1 teaspoon distilled white vinegar

1 cup whipping cream
1 tablespoon sugar
2-4 cups fresh fruit (any berry, kiwifruit, mandarins, etc.)

Preheat oven to 300°F (150 C) with rack in middle. Line a large baking sheet with parchment paper.

Whisk together superfine sugar and cornstarch in a small bowl.

Beat whites with a pinch of salt using an electric mixer at medium speed until they hold soft peaks. Add water (the peaks will disappear) and beat until whites again hold soft peaks.

Increase speed to medium-high and beat in sugar mixture 1 tablespoon at a time. After all the sugar has been added, beat 1 minute more.

Add vinegar and beat at high speed until meringue is glossy and holds stiff peaks, about 5 minutes (longer if using hand-held mixer).

Gently spread meringue in a 6-inch (approx.) circle on parchment, making edge of meringue slightly higher than center (the "crater" is for cream and fruit). Bake until meringue is pale golden and has a crust, about 45 minutes. The outside will crack and be solid while the inside will remain marshmallowy.

Turn oven off and prop door open slightly with a wooden spoon. Cool meringue in oven 1 hour.

Beat cream with sugar until it just holds stiff peaks and spoon into meringue. Mound fruit and/or berries on top. Take lots of pictures, because this will likely become a scary mess once you cut into it - enjoy!

Wednesday, June 24, 2009

Worthy of no pictures

This is just embarrassing. Here I commit myself to a food blog, get off to a great start, then instantly fizzle out. In my defense, it's been a madhouse in my life these past few weeks. We moved house last week and are taking a trip to Japan this week. Blogs (and cooking) have not been at the top of my list of priorities, sadly. I haven't even taken any pictures of, well, anything! What have I been feeding my family all this time, you might be wondering? I'm sad to report that an inordinate amount of fish 'n chips have been consumed. At least I varied the fry shacks from which we ordered. Sigh. My head is hanging in shame. I did manage to make something of some nutritional and gustatory value last week, though: French onion soup. I apologize for the lack of pictures, but like I said, the camera has been laying dormant amidst the packing frenzy. I'll hopefully make it again soon this winter, so will post pictures when I do. Hey, I'll take any excuse to make delicious onion soup again!

Many of you may roll your eyes and gag yourselves and call me a heretic when you see that my recipe does not use any sort of red wine or sherry. But, as previously mentioned, we are an alcohol-free household and have had to be creative in finding adequate substitutes. Onion soup has been an especially difficult substitute to find, because the flavor of the wine is so integral to the flavor of the onions and soup. I shied away for years because of this, but no more, friends! No more! While it's nowhere near as good as the one I had in Paris (but come on, it's Paris!), it's still perfectly delicious.

Soupe a l'Oignon au Fromage (French Onion Soup)
Adapted from Gourmet, Jan 1991
Yield: 6 servings


6 large onions (about 5 pounds/2.25 kg), sliced thin
1/4 cup (2 oz/50 gr) unsalted butter
1 1/2 tablespoons balsamic vinegar
2 teaspoons sugar
1 tablespoon all-purpose flour
1 1/2 quarts (1.5 ltr) beef broth
twelve 1/2-inch-thick slices of French bread, toasted
3/4 pound (350 gr) coarsely grated Gruyère

In a large heavy-bottomed pot cook the onions in the butter over moderately low heat, stirring often, for 45 minutes, or until they are golden brown. Add vinegar and sugar and cook until absorbed, 1-2 minutes. Sprinkle the onions with the flour and cook the mixture, stirring, for 3 minutes. Add the broth slowly, stir the soup constantly until it comes to a boil, and simmer it, covered, for 20 minutes. Season the soup with salt and pepper. Put 2 slices of the toast in each of 6 heated soup bowls, top each toast with 1 tablespoon of the Gruyère, and pour the soup over the toasts.

Saturday, May 30, 2009

In between

Sometimes you just need to have a baking day with a girlfriend. My friend Chevon came over this afternoon with her Big Book of All Things Chocolate. After poring through the pages and drooling over the many delectable recipes, we finally settled on making brownies.

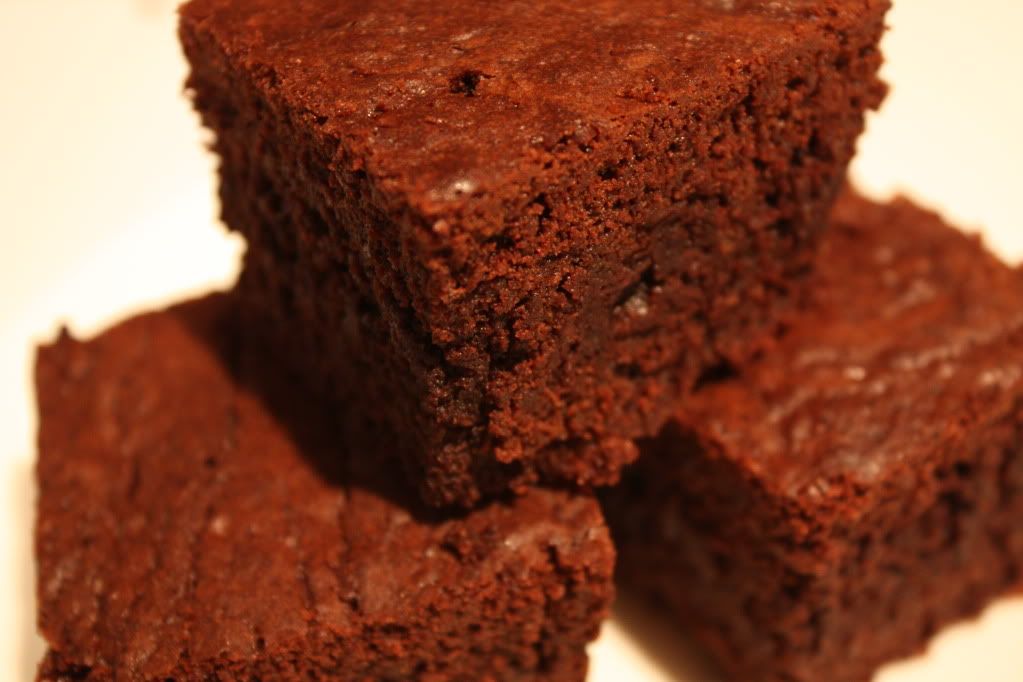
I know, right? Of all the things we could have attempted in its gourmet catalog, we chose perhaps the most humble of all chocolate recipes. But can you blame us? What a pure and simple way to showcase chocolate! Besides, we both hadn't had brownies in far too long. Then the real debate began: should we make cakey or fudgy brownies? With or without walnuts? We are both chocolate purists, so without walnuts was an easy decision. Cakey vs. fudgy, on the other hand, was a bit more difficult to decide; the book had one recipe for each. The cakey recipe seemed a little too cakey, while the picture of the fudgy recipe just looked like fudge. Is it too much to ask for something in between? We ended up chickening out of using the book's recipes and turned once again to my trusty old epicurious.com for inspiration. As luck would have it, there was a brownie recipe that claimed it could be cakey or fudgy, depending on how long you cooked it. Well, thought we, it looks like we can get the best of both worlds after all! We'll only baked them 5 minutes longer than the minimum time to achieve brownie nirvana. And off we went...

Sadly, brownie nirvana will have to wait for another day. The brownies, while completely delicious, perfectly rich (but not gaggingly so), and chocalatey, were quite cakey. They got a bit fudgier after fully cooling down (but who wants to wait for that, honestly?), but the end product was still a very cakey brownie. It was with much sorrow that we all gobbled up the brownies with several glasses of milk and had seconds and thirds. I think I've uncovered a new mission in life: The Quest for the Ultimate Brownie, or, if you prefer, Brownie Nirvana.

Cakey Brownies
adapted from "Gourmet" magazine, Oct. 2003
Don't let my sad tale of woe deter you - these brownies are still quite amazing. Bake them the minimun amount of time (or slightly underbake them) if you want to try for fudgier results, and let me know how it goes.

2 sticks (1 cup) unsalted butter
8 ounces fine-quality bittersweet chocolate (not unsweetened), coarsely chopped
1 1/4 cups all-purpose flour
1/3 cup unsweetened cocoa powder
1 teaspoon baking powder
1/2 teaspoon salt
1 2/3 cups sugar
4 large eggs
2 teaspoons vanilla

Put oven rack in middle position and preheat oven to 350°F. Grease a 9-inch square baking pan (2 inches deep) and line bottom and sides with parchment paper, then butter paper.

Melt butter and chocolate in a medium heatproof bowl set over a saucepan of simmering water, stirring occasionally, until smooth.

Whisk together flour, cocoa powder, baking powder, and salt in a small bowl.

Whisk together sugar, eggs, and vanilla in a large bowl, then pour in chocolate mixture, whisking until combined well. Whisk in flour mixture, then stir in walnuts and transfer batter to baking pan.

Bake until top is shiny and set and sides have begun to pull away slightly (a wooden pick or skewer will not come out clean), about 35 minutes, for fudgy brownies; or until wooden pick or skewer comes out clean, 50 minutes to 1 hour total, for cakey brownies.

Cool brownies completely in pan on a rack. Invert onto a cutting board, remove paper, and cut into squares.

Tuesday, May 26, 2009

Lazy baking

Sometimes you want something dessert-y without all the hassle of making a dessert. Sometimes you just want a snack that won't fill you with self-loathing for slipping on the diet yet again. Sometimes you don't have a whole box of butter or a whole bar of chocolate or anything terribly fancy, for that matter. Here's your answer: Lemon and Honey Cake.

lemon cake

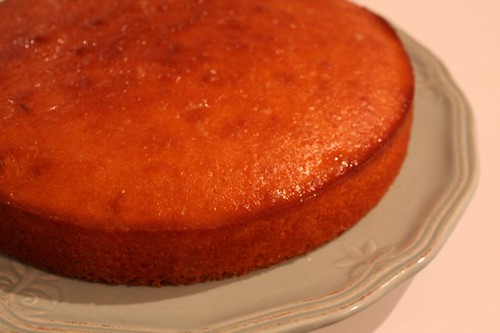
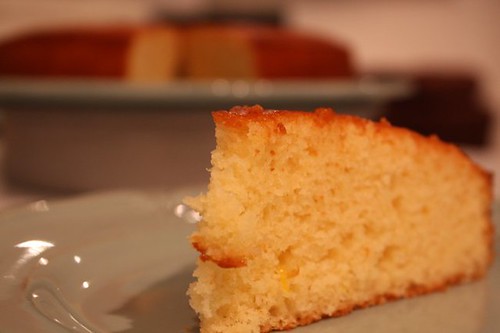
It's moist, it's substantial but not dense, it's perfectly zingy, and it's perfectly (read: not too) sweet. What's not to love? The best part is: it's completely easy to substitute most of the ingredients for whatever you have on hand. Oh, and it's moderately virtuous. Praise indeed!

lemon cake slice

Lemon and Honey Cake
adapted from Orangette

1/2 cup plain yogurt (or fruity yogurt, preferably lemon flavored, or even sour cream)
1/3 cup honey
1/2 cup sugar (a little less if you used sweetened yogurt)
3 eggs
1 teaspoon vanilla
1 2/3 cup flour
2 teaspoons baking powder
zest from 1 large lemon
1/2 cup oil

juice from 1 large lemon (or use 2 if you really like your lemon flavor)
1/3 cup powdered sugar

Preheat oven to 350 degrees Farenheit. Butter a 9" round cake pan, then line bottom with parchment paper and butter the parchment.

In a large bowl, whisk together yogurt, honey, sugar, eggs, and vanilla until well blended. Sift in the flour and baking powder, then add lemon zest, and mix with a spatula or wooden spoon until just combined. Add oil and mix until incorporated. Bake for 30-35 minutes, or until wooden toothpick inserted in center comes out clean. It will be a little dark because of the honey - that's okay. Remove to a rack and allow to cool completely in pan.

While cake is cooling, whisk together the lemon juice and powdered sugar. When cake is fully cooled, remove from pan and drizzle glaze over top. It will be very thin and will soak into the cake. Enjoy!

Wednesday, May 20, 2009

It's the Great Pumpkin [soup], Charlie Brown!

I love pumpkin! I really do. And I love coconut milk. And cilantro. And ginger. There's this amazing Thai pumpkin soup (Keg Bouad Mak Fak Kham) in Hot Sour Salty Sweet by Jeffrey Alford and Naomi Duguid. It has pretty much everything I love together at last in one happy pot. As written, the recipe was delicious - silky smooth with small chunks of pumpkin for texture. Then I decided to get crazy with the immersion blender and puree the whole thing. That took it to 11. Oh yes, I went there - and so did the soup. After sitting for a few hours to let the flavors blend, everything seemed more intense. The rich, sweet pumpkin and coconut milk, the spicy ginger, the salty fish sauce, and the refreshing cilantro all made for a multi-layered tasting experience. Mostly, though, it was just plain yummy.
pumpkin

"Wait a minute - fish sauce??" you must be wondering. Oh yes, my friends. Fish sauce. Straight from the bottle, its smell is pungent enough to knock your socks off. The flavor is equally strong. I grew up with this as a common condiment with all the Vietnamese food we ate, but it's not for everyone. That said, you should definitely NOT omit it. If you're unsure, just add it one tablespoon at a time and work your way up to taste. You won't regret it.
cilantro

Silky-Coconut Pumpkin Soup (Keg Bouad Mak Fak Kham)
adapted from Hot Sour Salty Sweet, by Jeffrey Alford and Naomi Duguid

3 to 4 shallots, chopped
1 1/2 pounds pumpkin or butternut squash (untrimmed), or 1 1/4 pounds peeled and trimmed
1 tablespoon fresh ginger, minced
3 tablespoons unsalted butter
1 can (14.5 oz) of coconut milk
2 cups mild chicken or vegetable broth
1 cup loosely packed cilantro (coriander) leaves
1/2 teaspoon salt
2 tablespoons fish sauce, or to taste
Generous grindings of black pepper
1/4 cup minced scallion greens (optional)

Peel and trim the pumpkin and clean off any seeds. Cut into small 1/2-inch cubes. You should have 4 1/2 to 5 cups cubed pumpkin.

In a large pot over medium heat, melt the butter and saute the shallots, pumpkin, and ginger until shallots are tender, about 5-8 minutes.

Add the coconut milk, broth, and cilantro leaves to pot and bring to a boil. Add the salt and simmer over medium heat until the pumpkin is tender, about 10 minutes. Stir in the fish sauce and cook for another 2 to 3 minutes. Taste for salt and add a little more fish sauce if desired. Serve as is for authentic Thai version. For bastardized Maxine version, puree the soup in a blender (working in batches) until smooth. This soup is best when allowed to sit for at least one hour. I like to make mine the night before.

When ready to serve: reheat soup over medium-low, ladle into individual bowls, and garnish with generous grindings of black pepper and minced scallions, if desired. I never bother, but I know it tastes good and looks pretty.
pumpkin soup

Sunday, May 10, 2009

Aversions

There are not many things that I don't enjoy eating. I love trying new and crazy foods, always with the full expectation of enjoying them. Then there are those few items which I desire with all my little heart to love. Things that embody the terms gourmet and refinement. Things that I have tried time and again to like. Tried, and failed. Olives are one of them. As an ingredient in a dish, it's fine, but by itself, blegh. I've tried nearly every olive I've come across, always with the hope that this will be the magic olive that reverses my natural impulse to gag when the squishy, briny mass hits the back of my tongue. I've always pictured myself lounging on a deck with friends dining on olives and cheese as the warm summer day comes to twilight. Sadly, that image will have to defer to another snacky item for the time being.

Here's another one: Eggplant. I always think of that old Looney Tunes cartoon where Elmer Fudd fights an invasion from eggplant-shaped aliens (not that that's at all a negative association). They're purple, they're shiny, and they feel really nice to touch. I want to like them, but the flavor and the texture have always been more than I can handle. It just never felt right on my tongue.
Ratatouille prep

And so it was on a cold, rainy afternoon that I finally decided to conquer my aversion to eggplant. I scoured recipe books for inspiration on what to make with the peculiar vegetable. It had to highlight the flavor and texture of the eggplant with enough going on in the background to soothe my anxious palate. The answer was perfection in its simplicity: ratatouille!
Ratatouille in pot

For those who don't know, ratatouille (pronounced "rat-a-TOO-weeh") is a traditional French vegetable stew composed of onion, eggplant, zucchini, red bell pepper, and tomato, along with herbs like thyme, fennel, and oregano. As noted in the eponymous movie, "it is a peasant's dish," which means it's simple for the cook and comforting for the eater. It highlighted each vegetable's flavor and texture without any one competing for your attention more than the other. And I'm happy to report that I've been converted to eggplant. I didn't have the red bell pepper on hand this one time, so I subbed mushrooms to add some more substance and texture, and you know what? I liked it! I'm sure die-hard authentic French cuisine fanatics are rolling their eyes and gagging at me right now, but if you're looking for truly authentic ratatouille, simply omit the mushrooms and get yourself a French grandmother.
Ratatouille

Ratatouille
adapted from Gourmet, June 1991
I like my stew on the chunky side, so I cut the vegetables larger and cook it for less time. If you like yours more mushy and melded, just cut everything a bit smaller and/or cook about 10 minutes longer at the end. Serves 4-6.

1 onion, thinly sliced
3 garlic cloves, minced
4 tablespoons olive oil
2 eggplants, about 1 1/2 pounds (750 g), cut into 1" cubes
4-5 medium zucchini, cut in half lengthwise, then cut into 1/2" pieces
1 red bell pepper, core and seeds removed, and chopped
1 punnet mushrooms (250 g), cleaned and quartered
1 1/2 pounds ripe tomatoes, coarsely chopped
1 teaspoon herbes de provence, or
1/2 teaspoon dried oregano
1/2 teaspoon dried thyme
1/4 teaspoon ground coriander
1/2 teaspoon fennel seeds
Salt, to taste
Fresh basil leaves

Heat 2 tablespoons oil in a large, heavy-bottomed pot over medium-low. Add onion and garlic and saute until tender, about 3 to 5 minutes. Turn heat up to medium-high and add remaining 2 tablespoons oil. When oil is hot but not smoking, add the eggplant and cook, stirring, until softened, about 6 minutes. Add zucchini, bell pepper, and mushrooms, and cook, stirring occasionally, until tender, about 10 minutes. Add tomatoes and herbs and cook, stirring occasionally for 5 to 7 minutes. Season with salt to taste and add fresh basil leaves. Serve immediately with some crusty bread.
Ratatouille bowl